Introduction to OpenPose
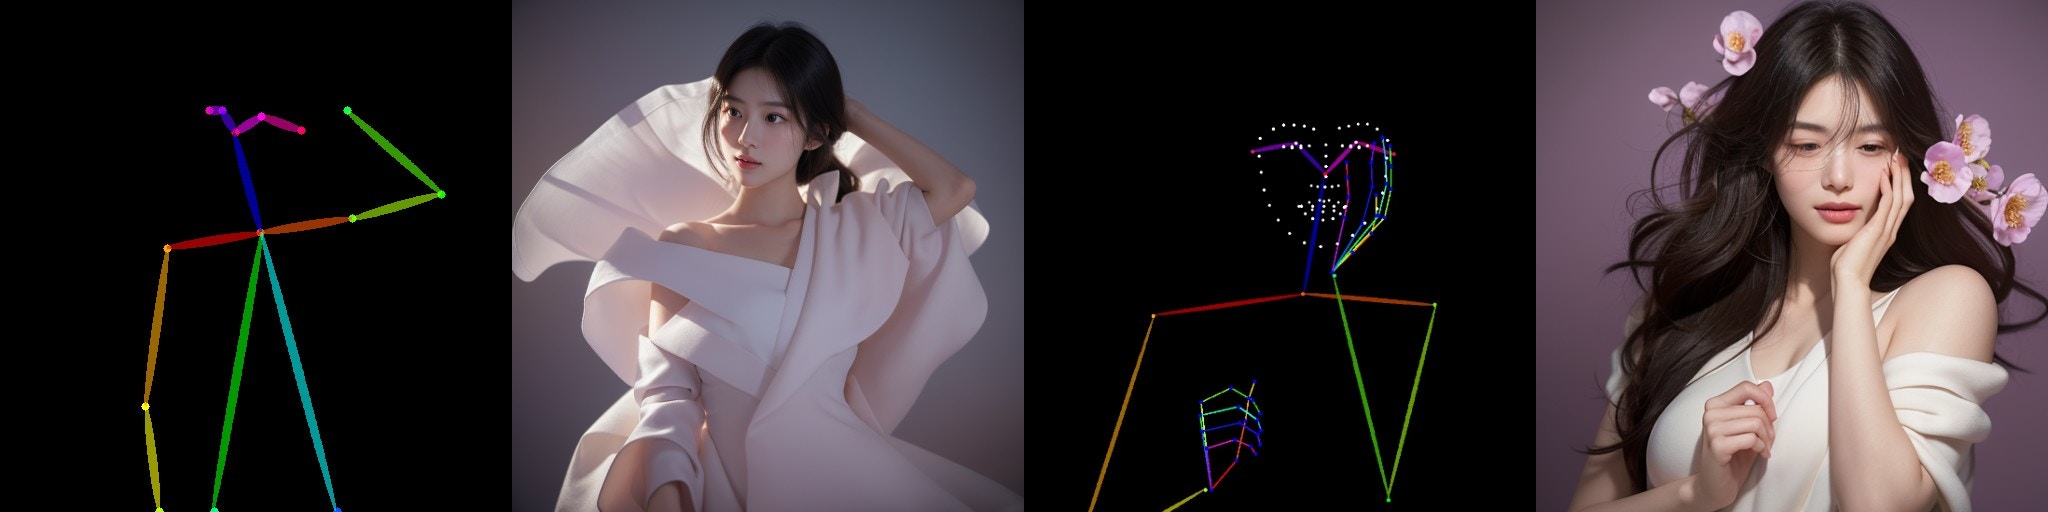
OpenPose is an open-source real-time multi-person pose estimation system developed by Carnegie Mellon University (CMU), representing a significant breakthrough in the field of computer vision. The system can simultaneously detect multiple people in an image, capturing:- Body skeleton: 18 keypoints, including head, shoulders, elbows, wrists, hips, knees, and ankles
- Facial expressions: 70 facial keypoints for capturing micro-expressions and facial contours
- Hand details: 21 hand keypoints for precisely expressing finger positions and gestures
- Foot posture: 6 foot keypoints, recording standing postures and movement details
ComfyUI 2-Pass Pose ControlNet Usage Example
1. Pose ControlNet Workflow Assets
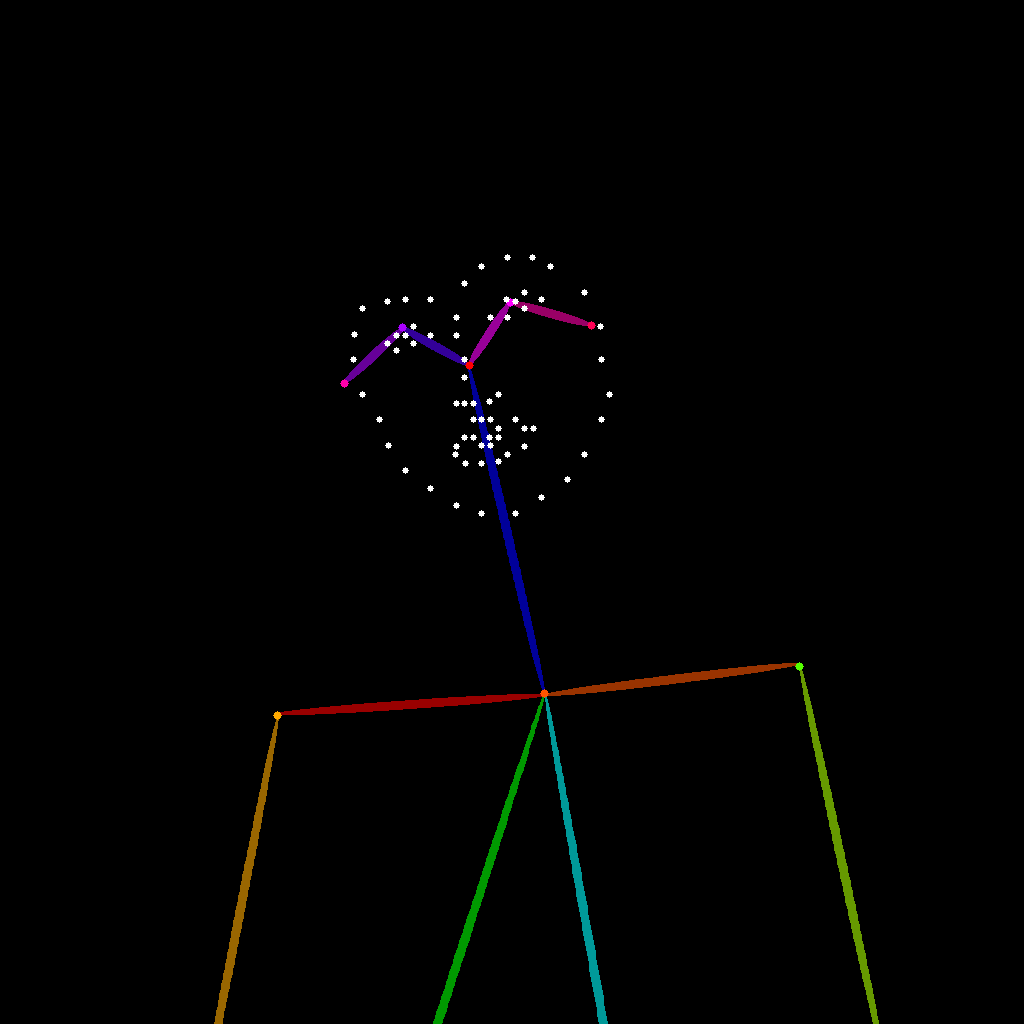
Please download the workflow image below and drag it into ComfyUI to load the workflow: Please download the image below, which we will use as input:
2. Manual Model Installation
If your network cannot successfully complete the automatic download of the corresponding models, please try manually downloading the models below and placing them in the specified directories:
- control_v11p_sd15_openpose_fp16.safetensors
- majicmixRealistic_v7.safetensors
- japaneseStyleRealistic_v20.safetensors
- vae-ft-mse-840000-ema-pruned.safetensors
3. Step-by-Step Workflow Execution
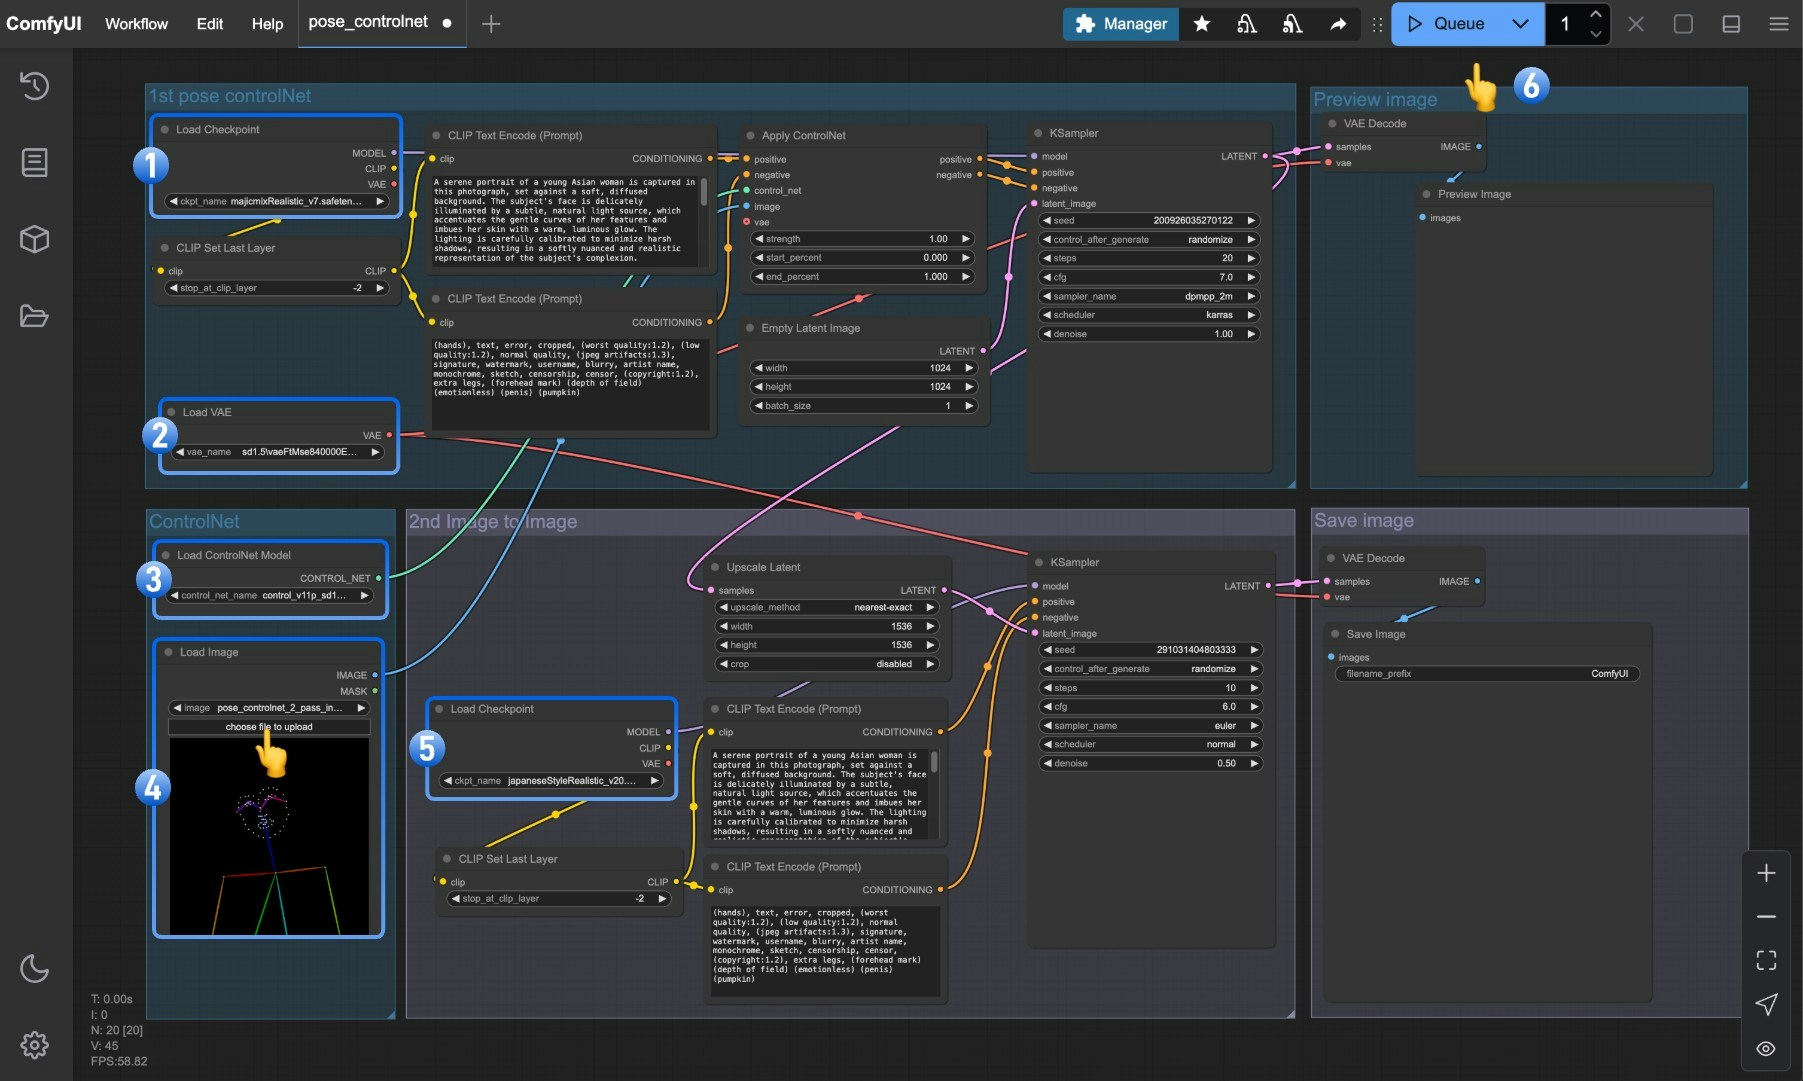
- Ensure that
Load Checkpointcan load majicmixRealistic_v7.safetensors - Ensure that
Load VAEcan load vae-ft-mse-840000-ema-pruned.safetensors - Ensure that
Load ControlNet Modelcan load control_v11p_sd15_openpose_fp16.safetensors - Click the select button in the
Load Imagenode to upload the pose input image provided earlier, or use your own OpenPose skeleton map - Ensure that
Load Checkpointcan load japaneseStyleRealistic_v20.safetensors - Click the
Queuebutton or use the shortcutCtrl(cmd) + Enterto execute the image generation
Explanation of the Pose ControlNet 2-Pass Workflow
This workflow uses a two-pass image generation approach, dividing the image creation process into two phases:First Phase: Basic Pose Image Generation
In the first phase, the majicmixRealistic_v7 model is combined with Pose ControlNet to generate an initial character pose image:- First, load the majicmixRealistic_v7 model via the
Load Checkpointnode - Load the pose control model through the
Load ControlNet Modelnode - The input pose image is fed into the
Apply ControlNetnode and combined with positive and negative prompt conditions - The first
KSamplernode (typically using 20-30 steps) generates a basic character pose image - The pixel-space image for the first phase is obtained through
VAE Decode
Second Phase: Style Optimization and Detail Enhancement
In the second phase, the output image from the first phase is used as a reference, with the japaneseStyleRealistic_v20 model performing stylization and detail enhancement:- The image generated in the first phase creates a larger resolution latent space through the
Upscale latentnode - The second
Load Checkpointloads the japaneseStyleRealistic_v20 model, which focuses on details and style - The second
KSamplernode uses a lowerdenoisestrength (typically 0.4-0.6) for refinement, preserving the basic structure from the first phase - Finally, a higher quality, larger resolution image is output through the second
VAE DecodeandSave Imagenodes
Advantages of 2-Pass Image Generation
Compared to single-pass generation, the two-pass image generation method offers the following advantages:- Higher Resolution: Two-pass processing can generate high-resolution images beyond the capabilities of single-pass generation
- Style Blending: Can combine advantages of different models, such as using a realistic model in the first phase and a stylized model in the second phase
- Better Details: The second phase can focus on optimizing details without having to worry about overall structure
- Precise Control: Once pose control is completed in the first phase, the second phase can focus on refining style and details
- Reduced GPU Load: Generating in two passes allows for high-quality large images with limited GPU resources